A relaxing bath can be more than just a moment of cleansing — it can be an immersive, sensory experience that rejuvenates the body and mind. Among the most beloved DIY bath products, bath bombs stand out for their fizzing magic, soothing aromas, and luxurious feel. Learning how to make bath bombs with essential oils not only adds a personal touch to your self-care routine but also ensures that what you’re using is natural, safe, and tailored to your preferences.

Making your own bath bombs is surprisingly simple and rewarding. With just a few ingredients, you can create spa-quality products at home, choosing the scents, colors, and textures that best fit your mood or occasion. This guide explores how to craft your own essential oil bath bombs from scratch, with tips for achieving the perfect texture, fragrance blends, and sustainable presentation.
Understanding the Magic Behind Bath Bombs
Bath bombs are small, compact mixtures of dry ingredients that effervesce when dropped into water. The fizzing reaction occurs when baking soda (sodium bicarbonate) meets citric acid, releasing carbon dioxide and creating that iconic bubbling effect. While this process feels whimsical, it’s based on simple chemistry.
What transforms a basic fizzing ball into a luxurious bath experience are the additional ingredients — essential oils, natural colorants, and nourishing components like coconut oil, Epsom salt, or shea butter. These additions soften the skin, calm the senses, and elevate bath time into a therapeutic ritual.
Why Use Essential Oils in Bath Bombs
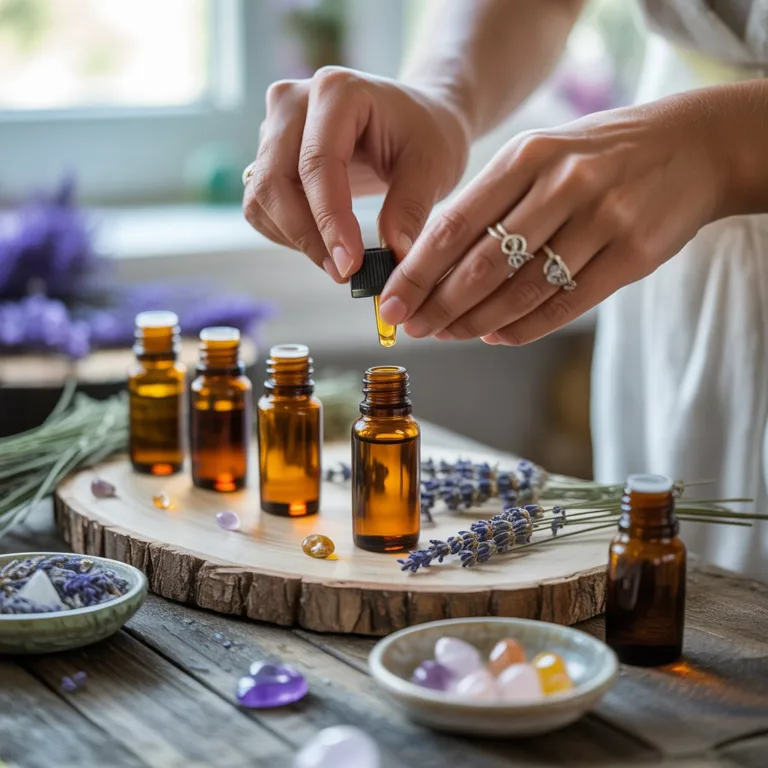
Essential oils are concentrated plant extracts with unique aromas and wellness benefits. When added to bath bombs, they do much more than provide fragrance. They can:
- Soothe stress and anxiety — Lavender, chamomile, and ylang-ylang are perfect for winding down.
- Boost energy and mood — Citrus oils like orange, lemon, and grapefruit add vibrancy.
- Relieve muscle tension — Eucalyptus and peppermint have cooling and pain-relieving properties.
- Enhance skincare — Tea tree, rose, and geranium oils help balance and nourish the skin.
By carefully choosing and blending essential oils, you can customize your bath bomb to match your emotional or physical needs, turning a regular soak into a form of natural therapy.
Gathering Your Supplies
Before crafting, organize your workspace and materials. You’ll need:
- 1 cup of baking soda
- ½ cup of citric acid
- ½ cup of cornstarch
- ½ cup of Epsom salt or fine sea salt
- 2 ½ tablespoons of carrier oil (like coconut, almond, or jojoba)
- 1 teaspoon of water or witch hazel
- 15–20 drops of essential oils
- Optional: natural colorants or dried flowers
- Bath bomb molds (metal or silicone)
These ingredients are widely available in eco-friendly or DIY supply stores, and many can already be found in your kitchen.
Choosing the Right Essential Oil Combinations
The beauty of creating bath bombs with essential oils lies in customization. You can blend fragrances for specific moods or wellness goals. Here are some tried-and-true combinations:
For Relaxation and Sleep
- Lavender + Chamomile
- Ylang-Ylang + Sandalwood
- Bergamot + Frankincense
For Energy and Clarity
- Lemon + Peppermint
- Orange + Eucalyptus
- Grapefruit + Rosemary
For Romance and Warmth
- Rose + Vanilla
- Jasmine + Patchouli
- Geranium + Cedarwood
When blending, start with a small number of drops to test how the scent develops. Essential oils are powerful, and a few drops go a long way.
Mixing and Shaping the Bath Bombs
Making the perfect bath bomb requires balance — too much liquid and the mixture will fizz prematurely; too little and it won’t hold shape. The goal is to achieve a texture similar to damp sand.
- Combine dry ingredients — In a large bowl, mix baking soda, citric acid, cornstarch, and Epsom salt.
- Mix wet ingredients — In a separate bowl, combine carrier oil, essential oils, and water (or witch hazel).
- Slowly integrate — Pour the wet ingredients into the dry mixture a little at a time, whisking continuously. If it starts fizzing, you’re adding liquid too fast.
- Test consistency — Squeeze a handful of the mixture; it should hold together without crumbling.
- Pack into molds — Press the mixture firmly into each half of the mold, slightly overfilling before pressing the two sides together.
- Let dry — Carefully remove the bath bombs after a few hours, then allow them to dry completely for at least 24 hours before use.
Coloring and Decorating Naturally
Artificial dyes can be harsh on the skin and environment, but natural colorants create beautiful, subtle shades while staying eco-friendly. Try these ideas:
- Pink tones: beetroot powder or rose clay
- Green hues: spirulina or matcha powder
- Yellow tones: turmeric or calendula petals
- Purple shades: blueberry powder or purple clay
You can also decorate your bath bombs by pressing dried flower petals or herbs onto the molds before filling them. Lavender buds, rose petals, or chamomile flowers not only look stunning but also infuse the bath with extra fragrance and charm.
The Role of Carrier Oils
Carrier oils serve as a base to dilute essential oils and provide moisture to the skin. They make your bath bombs both functional and nourishing. Some popular options include:
- Coconut oil: deeply hydrating and antibacterial.
- Sweet almond oil: lightweight, suitable for all skin types.
- Jojoba oil: closely resembles natural skin sebum.
- Olive oil: rich in antioxidants and ideal for dry skin.
Using carrier oils ensures your bath bombs are gentle and beneficial even for sensitive skin.
Sustainable Packaging Ideas
Eco-friendly presentation matters as much as the product itself. Instead of wrapping bath bombs in plastic, consider sustainable alternatives:
- Kraft paper or tissue paper tied with twine.
- Recycled glass jars labeled with handwritten tags.
- Cotton pouches that can be reused.
You can even repurpose old tins or cardboard boxes to store your bath bombs. Labeling them with the essential oil blend and date of creation adds a personal, professional touch — ideal if you’re gifting or selling your creations.
Troubleshooting Common Problems
Even experienced DIY crafters encounter small issues. Here’s how to fix common problems:
- Mixture expands or crumbles: Too much moisture. Try adding less liquid next time.
- Bath bombs don’t fizz: Baking soda or citric acid might be old. Use fresh ingredients.
- Surface cracking: Molded too dry or dried too quickly; add a few drops of oil or water next time.
- Color fades: Use more concentrated natural colorants or store in a cool, dark place.
Experimenting is part of the fun. Each batch teaches you more about consistency, humidity, and blending.
Safety and Storage Tips
Bath bombs made with essential oils should be stored in an airtight container away from sunlight and humidity. Exposure to air can reduce the fizzing effect over time.
Always test a small piece on your skin if you’re using a new essential oil to ensure no irritation occurs. For children, pregnant women, or people with certain medical conditions, consult a professional before using specific oils like peppermint or clove, as they can be too strong for sensitive users.
Turning Bath Bomb Making into a Family or Business Activity
Creating bath bombs with essential oils can easily become a family project or a small eco-business idea. Kids love participating in the molding and decorating process, and it’s an excellent way to teach them about sustainability and natural ingredients.
If you’re interested in selling them, focus on natural, zero-waste branding — customers appreciate environmentally conscious products. Showcase your creations on social media, highlight your essential oil blends, and emphasize handmade quality. With time and creativity, your hobby can transform into a small income source.
Embracing Wellness Through Handmade Bath Products
Crafting your own bath bombs allows you to reconnect with nature through touch, scent, and creativity. Every blend you make carries a part of your personality — whether it’s the calming essence of lavender or the zesty energy of citrus. Using essential oils transforms this DIY craft into a ritual of wellness, mindfulness, and self-expression.
Next time you crave a moment of calm, drop one of your homemade bath bombs into warm water, breathe in the aroma, and enjoy the fizzing magic. You’ll be amazed at how a simple blend of baking soda, oils, and creativity can turn an ordinary bath into a small act of self-love.

Lucas Hartman is a DIY enthusiast and sustainability advocate focused on natural crafts and eco-friendly home décor. With a background in arts and design, Lucas creates tutorials that help families and hobbyists transform everyday recycled or organic materials into beautiful, functional projects.